Proper valley flashing installation isn’t difficult to achieve. In fact, following a few basic installation procedures will typically achieve a reliable installation. Even so, a high percentage of valley flashings are not installed properly because the roof repair company does know the basics. Or, these roofers know how to do the job right, but choose to cut corners (at your expense). Regardless of the reason, when it is not installed properly the risk of significant interior damage is great.
Recommended procedures of basic valley flashing installation:
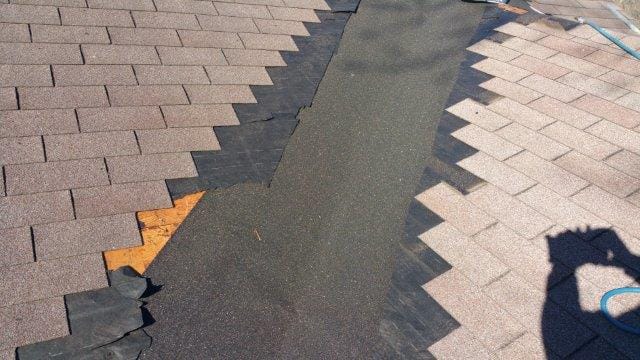
- Install an underlayment centered in the roof valley.
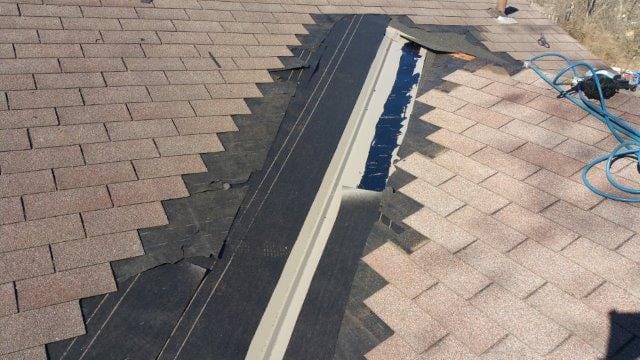
- Then, install a non-corrosive metal valley flashing of 24″ minimum width
- Lap successive sheets of metal flashing a minimum of 12-inches and seal laps.
- Apply an approximately 3-inch width of asphalt roofing cement along the sides of flashing and embed shingles in mastic
- Clip the top corner of shingles along valleys to keep water flow toward center of valley.
- Take care not to place any fasteners in the exposed center area of the metal flashing.
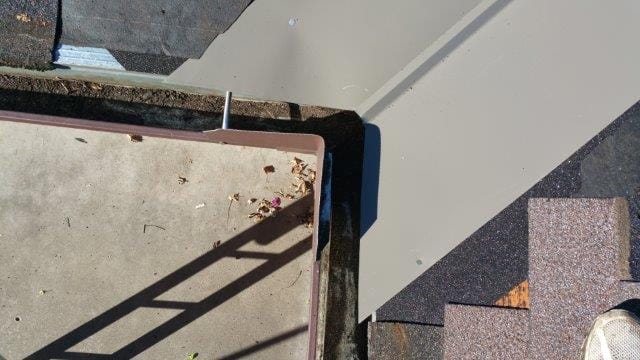
- Extend entire width of flashing “completely” to the bottom of the roof valley.
- Cut bottom of flashing so the entire width of the valley flashing extends approximately 1/2″ to 3/4″ over the fascia trim board along eaves
The following photos illustrate removal and replacement of a closed cut valley with new open metal valley


Avoid the following common errors:
- Fasteners placed in the exposed center area
- Punctures in the center of the valley
- Failure to extend the entire width of the metal valley flashing beyond the eave of the roof.
- Installing a “closed” valley (a.k.a. installing “laced” shingles in a roof valley) when shingle manufacturer does not approve of.
- Installing corrosive type metal flashing in valley
Need Help with your Roof Repair? Hire the Best Roofing Companies
Vaught Roofing is a Roofing Kansas City company with over 55+ years experience!
